
In Part 3 of this blog series we will look at configuring Azure Databricks. You can read the initial installation guide in Part 2.

Accessing Azure Databricks
If you have successfully deployed Azure Databricks then you already have sufficient permission to log in, so we will skip directly to access.
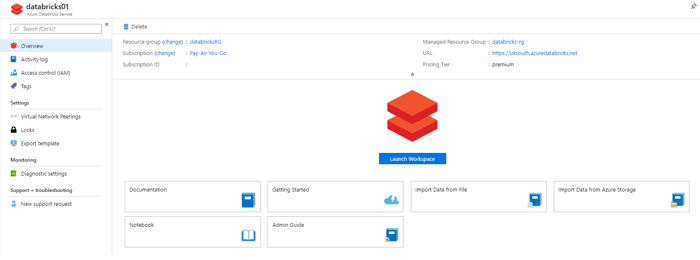
Azure Databricks can be accessed either via the "Launch Workspace" icon or via the listed URL shown in the image below. Note that the URL prefix is region specific, but will look similar to the following - https://uksouth.azuredatabricks.net
Once you have accessed the web interface you are met with a ribbon of options, which are as follows:
- Azure Databricks
- Home
- Workspace
- Recents
- Data
- Clusters
- Jobs
- Search.
The two options that we will concentrate on are Clusters and Workspace. Simply put, the Workspace is our current work area where we store our notebooks. A notebook is our collaborative script(s) which we will run in Azure Databricks.
Let's click the Workspace icon, right-click on a folder to create a simple a notebook named test. Finally add some simple code so you end up with a window that looks as follows:
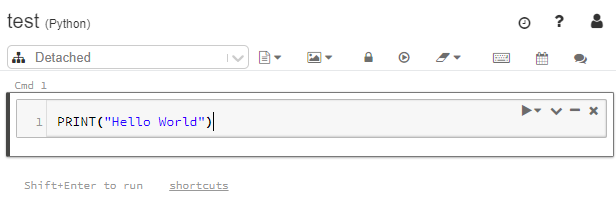
This can be executed using either the Play button or the Run All, however both will fail because the Notebook is "Detached".
The notebook is "Detached" because it is not able to run on any compute.
Configuring Azure Databricks Cluster
We need compute to run our notebooks and this is achieved by creating a cluster. A cluster is merely a number of Virtual Machines behind the scenes used to form this compute resource. The benefit of Azure Databricks is that compute is only chargeable when on.
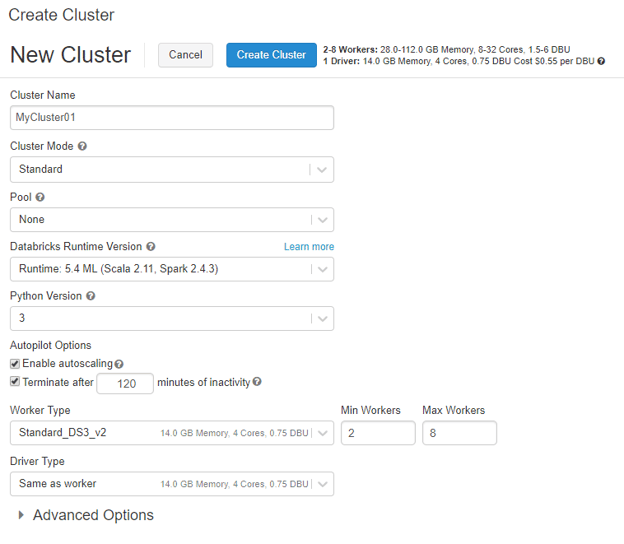
Let's now click the Clusters icon and set up a simple cluster. Once you have loaded the page you can use the "Create Cluster" button.
The only input that is needed is to set a "Cluster Name", all the other settings can be left as default. Once this cluster is created and running you can attach your notebook and run your query successfully.
For those of you that want a bit more detail on the options, please read on:
- Cluster Mode - This gives you the option to use change from Standard to a High Concurrency Cluster. If you are unaware of what you need please leave as Standard as this is not a go-faster setting (https://docs.azuredatabricks.net/user-guide/clusters/high-concurrency.html#high-concurrency).
- Pool - This maintains a set of standby compute machines ready and waiting to be used. It helps reduce spin-up time for the cluster(s), but I would leave as off unless needed.
- Databricks Runtime Version - Which version of Scala, Spark and other things do we need? If in doubt leave as default.
- Python Version - Which version of Python? You will very likely want to be using the latest.
- Autopilot Options - Enable auto scaling of the resource up and down and terminate after x minutes of inactive.
The final configurable is the size of the compute we are going to create. We have a single brain/leader/Driver node and one or more Worker node(s). More nodes will results in more cluster resource, but will attract a higher cost for running. Remember you are billed for these resources when they are on.
Note that a cluster may fail to form if your core count attached to your subscription is reached. This can be rectified by contacting Microsoft via a support ticket.
Discover how to give your users access to Databricks in Part 4 of this series.
