
From time to time I get something come across my desk that is completely new to me, as was the case here. I was tasked with creating a front desk check-in app to replace the existing 3rd party product we currently use. Below I walk you through my tale and the thought processes I followed throughout. Hopefully you'll learn a little about Power Apps, what it can do and have some food for thought, should you need to begin developing your own.
Tldr; I make mistakes in Power Apps, so you don't have to
The brief
Visitors to the Coeo office must check in at the front desk via an app that captures who they are here to see and their contact information. The app then notifies who they're here to see (their sponsor) who takes responsibility for them as they are escorted around.
When starting my Power App I had little to no experience, so I first had to decide whether to create a model driven or canvas driven app.
Canvas apps
These are exactly what they say on the tin. A blank canvas that we have a great deal of control over to do as we wish. You can drag and drop components in any configuration and adjust their size, formatting and design in innumerable ways and so they offer a great deal of flexibility and individuality. Canvas apps are also more diverse in their data sources as they can use over 200 connectors out of the box.
Model apps
Model driven apps are driven by the data itself, pulled from the Common Data Service (CDS). Entities within the CDS are typically created and then the app built off of it. Many Microsoft apps, including Dynamics 365, are model driven.
I chose a Canvas app as I wanted the increased level of control that it gave and my use-case/brief was for a more task-based application. In my research I also heard several sources saying that canvas apps are easier to get started with as the structure of the data is less key and the user experience a little more intuitive.
My data with destiny (data source selection)
The second decision I had to make around my app was which technology to use to store my data. I initially decided to go with Excel, but later changed to using an Azure SQL database (with little difficulty in the migration I might add, more on that below).
If you do elect to use Excel, as I did initially, then I strongly recommend using tables rather than relying on sheets themselves. Tables mean that your layout of data makes much more logical sense and, aside from being more obvious when importing them, it is much easier to make the shift over to a SQL database or similar if you later decide to do so. Future-proofing is rarely a bad idea.
Templates
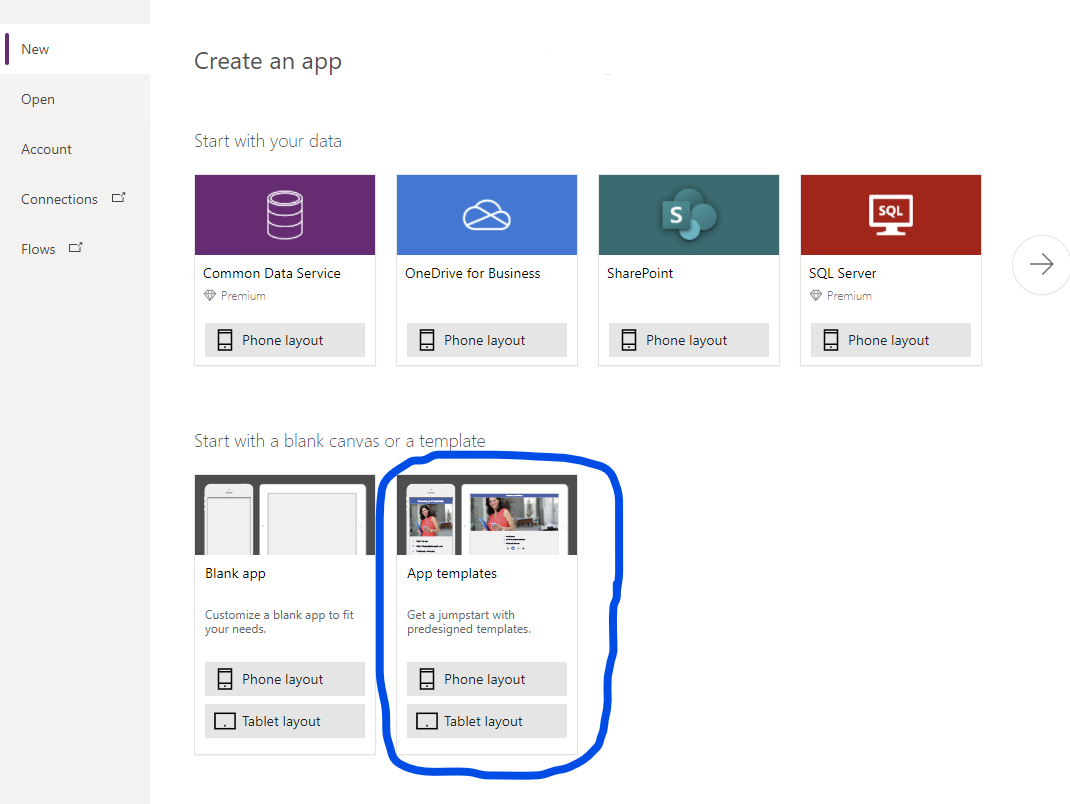
A challenging aspect of any new tool is knowing what you can do with it. The Power Apps team have given new users a head start in that regard by including a generous number of pre-created templates.
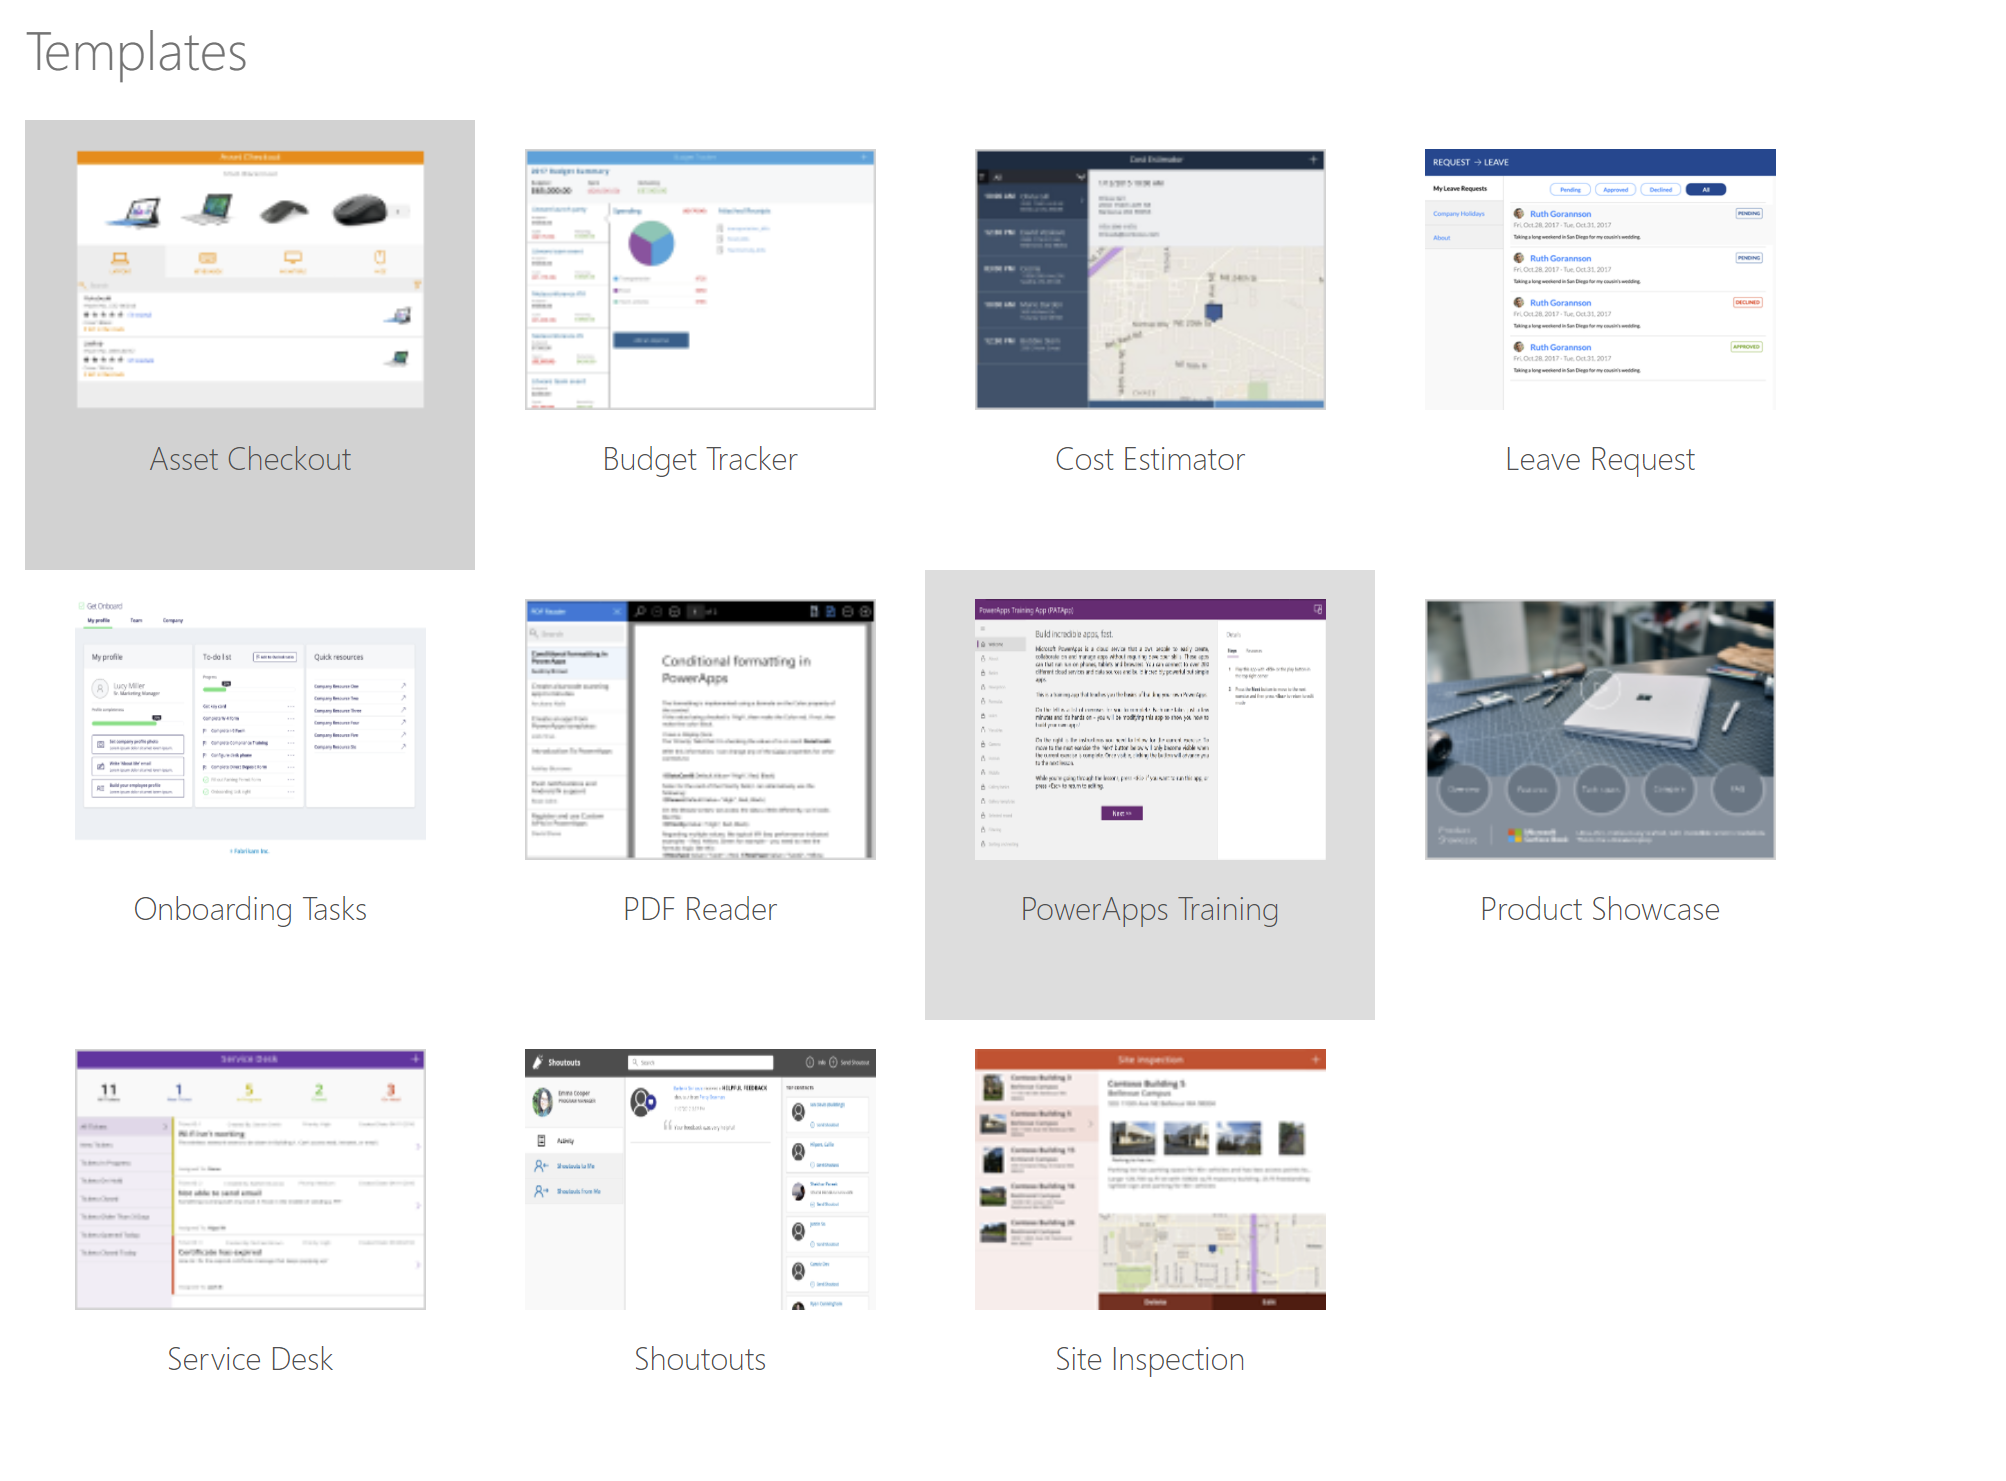
To get a feel for what I could do, I spent an hour or two playing around with the various templates available to you when creating an app:
There weren't any that specifically did what I wanted to do, however looking and clicking around them got me to start thinking about how I wanted my app to feel, so I decided to get started. I initially tried using some templates and removing the parts I didn't need, but this ended up feeling messy and I wanted a fresh start.
Creating a new Blank Canvas App I decided to begin with what I knew I would need: Sponsors would receive their notification of a visitor through email, and there is a nice "Email" screen under "New screen" in the top left.
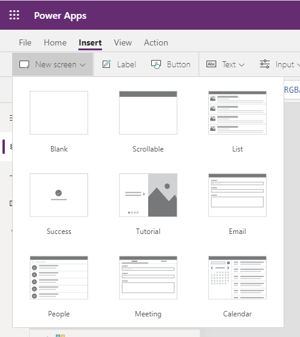
Screens are essentially what the user will see, and remind me a little of slides in PowerPoint: you use them to display content to an audience and transition between them with an optional effect. In our App, of course, the content will be dynamic and we'll have buttons and places for user entry too.
The email screen I started with gave me quite a lot of useful components:

I could search through the address book in Office 365 (once connected) and could pick, add, and remove contacts from the "To" box. There was also code pre-generated within the "OnSelect" property of the button in the top right to collate the text from the input boxes into an email. To develop this further into what I needed I expanded/adapted the functionality, adding new fields for the data I needed to gather such as Name, Surname, Visit reason, Arrival time and so on, and with a little research was able to submit data into my Excel table using the Patch() function.
A form of data without pain
The problems began to arise when I wanted to implement more complicated logic and include any kind of data manipulation (for example pre-populate certain fields with relevant data). I was used to .Net and it took a short while before I discovered that I wasn't able to easily set the values of text boxes from buttons or other code and more that this had to be done from the other side. The value and text properties had to always equal the same text or formula. To get around this I looked at using variables as this means a text field can equal a variable (and that variable can then be modified).
As I developed a little more, adding a welcome page to the app and more functionality to my email form itself, I came to implement data validation and it was the straw that broke the camel's back. I'll say it here, if you are manipulating data or gathering user input, it may appear more involved but invest your time and do this via Forms. It saves a great deal of time in the long run and actually isn't too hard once you know how, there are plenty of guides out there. Gathering your user data by forms also allows it to dynamically adjust to screen size and generally formats it much nicer than if you were doing so by hand.
Forms also take a lot of the heavy lifting out of your data updates. Rather than a long patch statement where you have to gather together all the data fields you need, it's a simple case of SubmitForm(YourFormName);
Moving from Excel to SQL Server
As we know, it's all well and good having data validated on the front end however, for security (and especially for our own sanity) it is equally or more important to validate your data on the backend. My final big change in terms of App structure came when I was looking into ways to do back-end data validation. I had originally intended to keep my App using free connectors only to keep costs down but the data validation, security, simultaneous updating and integration with Power Apps forms convinced me.
I was expecting to run into a lot of issues in migrating over to SQL Server however it was painless. This was mainly because I used tables within Excel (remember my earlier recommendation) so little refactoring of code was required. I created my Azure SQL DB on the Basic tier (which costs me around £3.50 per month) and created the several tables I had in my excel sheet as SQL tables. I then added relationships and lots of constraints to these tables to ensure that only data that met my requirements could be added, this included NOT NULL columns, minimum lengths and so on.
I added the database as a new data source within Power Apps itself and then, as my structure was realistically the same, simply updated the references to the excel table to instead point to the SQL Server table.
Finished Check-In screen and tips
After all that my Check-In screen worked as intended and the process was as follows:
When the submit button is pressed, it is quite straightforward to concatenate all the values in the mail property in the MyPeople collection (populated by the "who are you here to see" dropdown). Then, we construct our email using the Office365Outlook.SendEmail method and finally the form is "submitted", which writes any needed changes to the database. This means that when someone is checked in, the person they're here to see is notified and also they themselves receive an email confirming that they've checked in.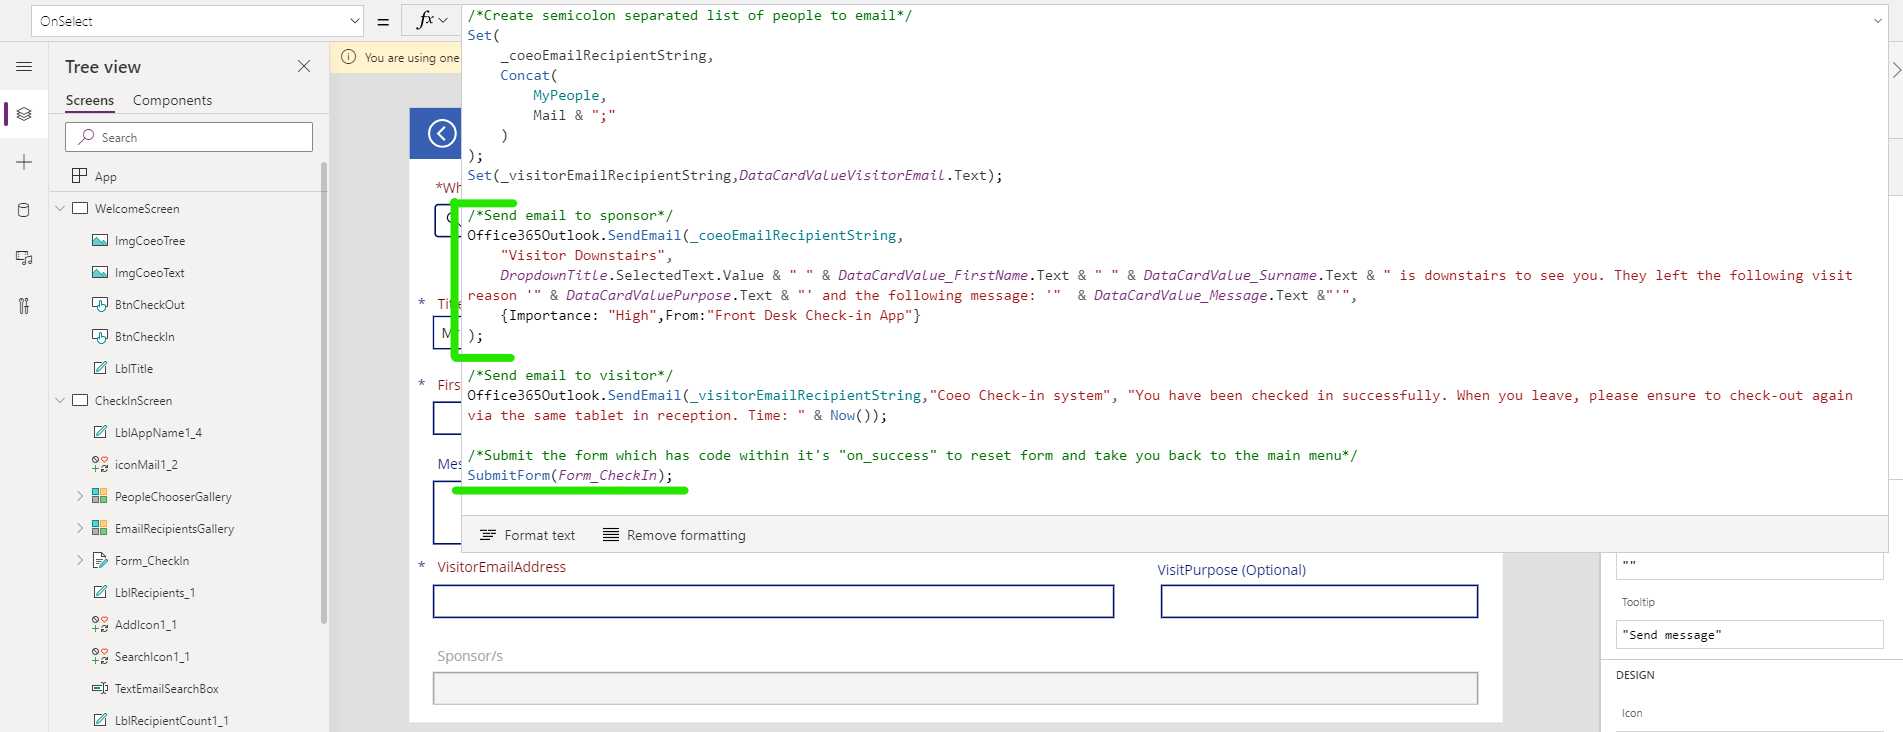
Important things to note are
- Controls can be set to disabled until certain conditions are met (like the submit arrow in the top right). This is done by setting the DisplayMode property to an expression that evaluates the content of fields.
- Fields that are mandatory (*) are forced to be so within the app and on the backend database.
- The Sponsor/s card at the bottom is greyed out as the DisplayMode property is set to DisplayMode.Disabled.
- The ArrivalDateTime is not editable as the display mode is set to DisplayMode.View and displays the time on form load using Now() (though the user is checked in at the time they click submit). If this display had to keep an up-to-date version of the time, this could be accomplished using a timer that updates a variable and have the field equal that variable.
- The gap between Title and ArrivalDateTime is done using an empty card/field in the form.
- Title is actually the ID of a foreign key (TitleID) to the title table. Despite this, it shows the user friendly Mr, Mrs, etc. This is accomplished by setting the card as normal except for within the Items property of the dropdown the foreign table is specified and TitleDesc is specified within the Value property, instead of TitleID. In this way, one form can pull data from several different tables at once.
- The green "submitted" bar that appears triggers from the OnSuccess property of the form, which is also where the form is reset and cleared prior to navigating back to the welcome screen
Check-Out screen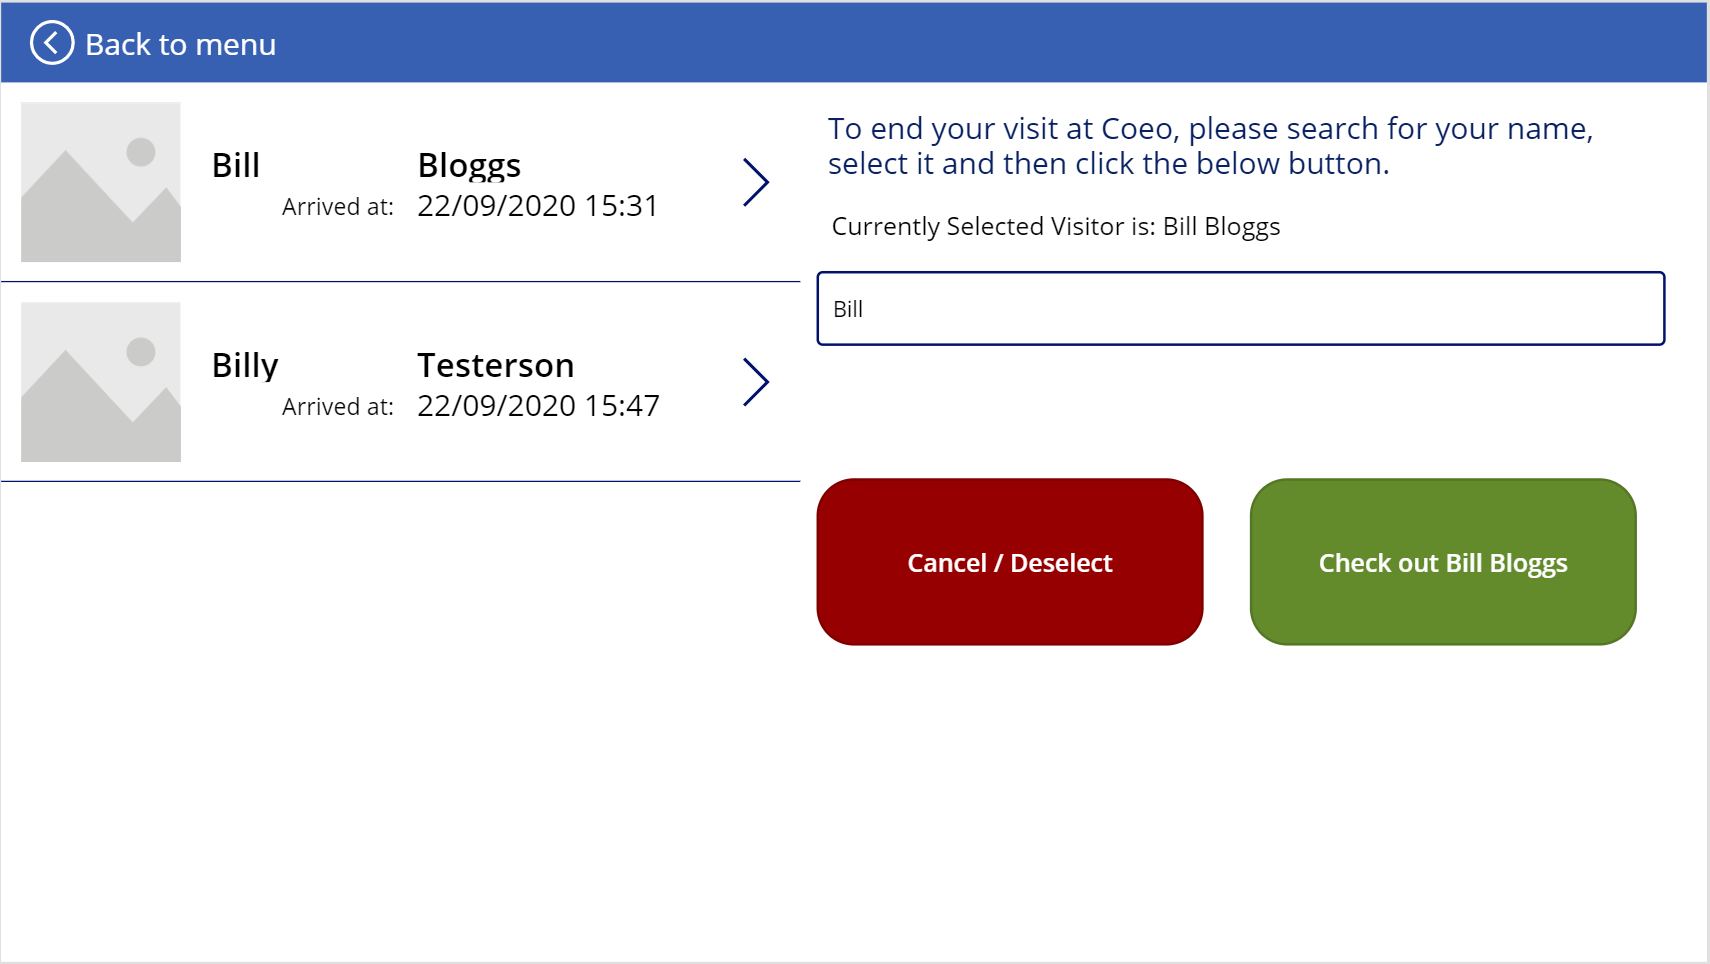
Simple and straightforward: there's lots of functionality baked into Power Apps including the ability to take pictures with the camera, use AR/Mixed reality, run images through machine learning, scan barcodes etc. While these are exciting (and I had lots of ideas of ways users could use their own phones/tablets to check out) the important thing to remember is to make your app user friendly. I discussed the various options with some test users and the feeling was that the simpler it could be made for users, the better.
Taking that feedback onboard, as exciting (and slightly impractical) as it could be, I decided that the simplest and most user friendly way would be to simply allow users to search through those checked in and select themselves to check out.
To mitigate the impact of users being checked out by mistake, and as a helpful confirmation, I added an email method (just like at check-in) to let users know if they have just been checked out.
Wrap-Up
Hopefully this has been useful to you as a reader. I've endeavoured to show that, while they are not always straightforward to build, all you need is some time and enthusiasm and you'll be surprised at how quickly it comes together. Hopefully there'll have been a tip or trick you can pick up to use in your own Power App.
Need help getting started with Power Apps? Our team can help. Visit our Power Apps Jumpstart page to find out more.
