
Have you ever wanted to try out SQL Server Availability Groups but never had enough spare tin lying around in order to setup an environment? Well the Azure portal has been updated and now you don’t need to have any physical kit lying around, nor do you need to worry about having a beefed up laptop running Hyper-V!
All you need is an MSDN subscription that allows you an amount of Azure credit. Luckily I have a premium subscription which entitles me to £65 of Azure credit every month. Firstly you’ll need to login to your MSDN subscription and activate your Azure subscription and then you’re ready to go!
At the end of August the SQL Server team announced the release of SQL Server Always On Azure portal gallery item. Prior to this particular gallery item being available if you wanted to configure an Always On Availability Group (AG) you needed to create all the individual machines that comprise the infrastructure manually. This would include setting up the virtual network, configuring the domain and then configuring SQL Server. The addition of the gallery item greatly simplified the task of creating and automating an AG.
In this tutorial I will show you where to find this gallery item and how to use the Azure portal to configure a SQL Server 2014 Always On Availability Group server setup.
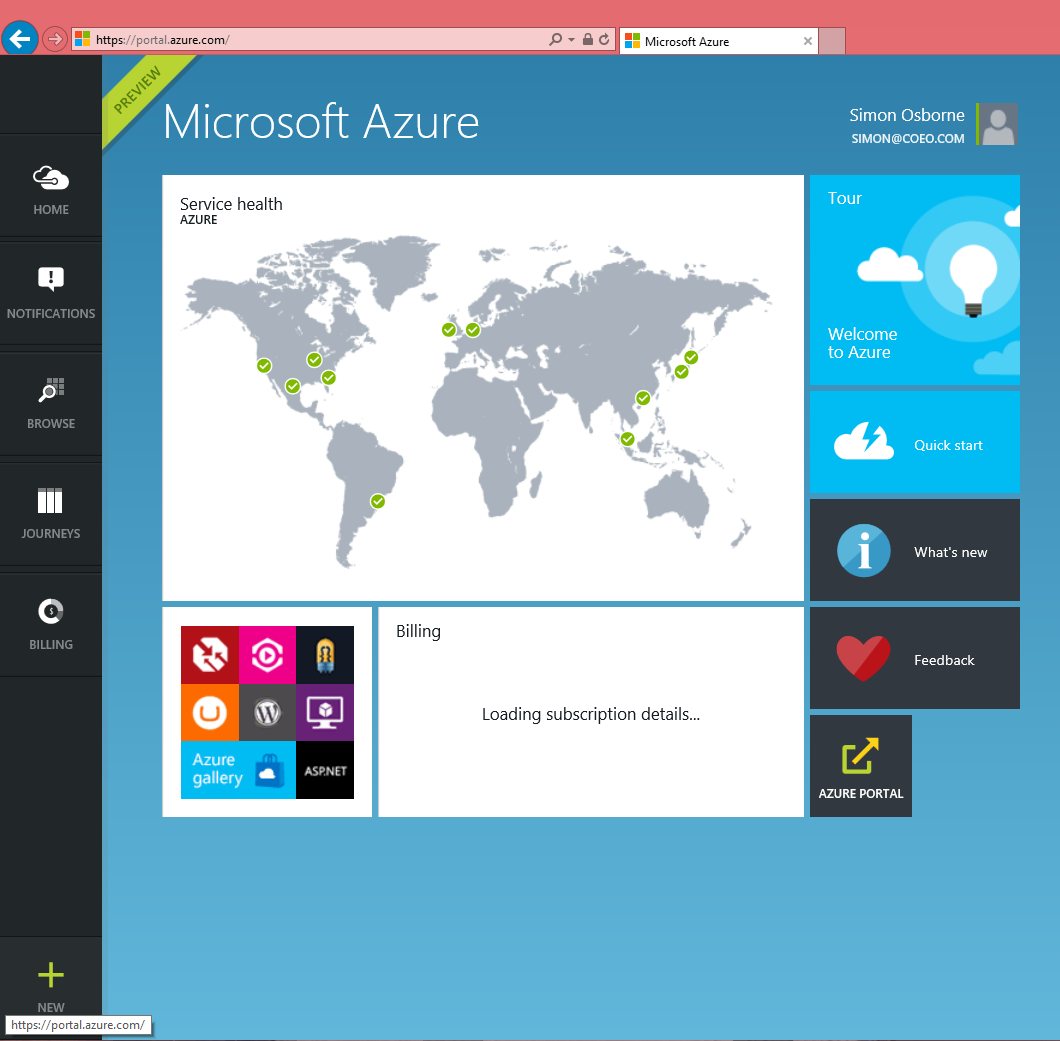
1) Using a web browser navigate to http://portal.azure.com and log into your Azure subscription. Once you’re logged in you will be presented with a screen that looks similar to the below.
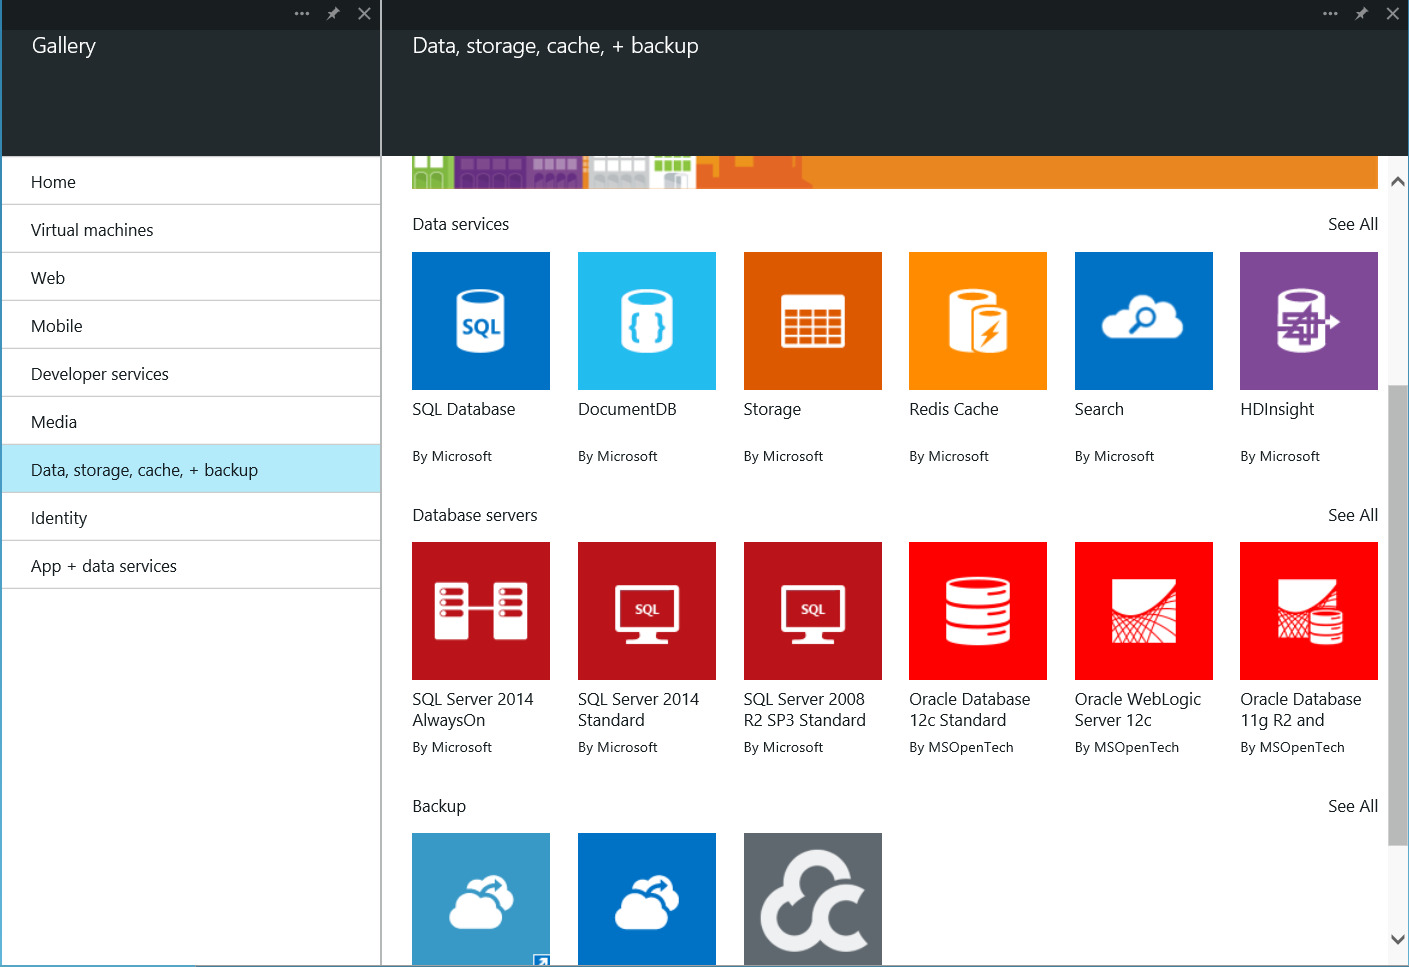
2) Click ADD in the bottom left hand corner, then click “Everything”

3) Click Data, storage, cache + backup and you should see an option for SQL Server 2014 AlwaysOn (you may also have seen this option available at other points in this process).
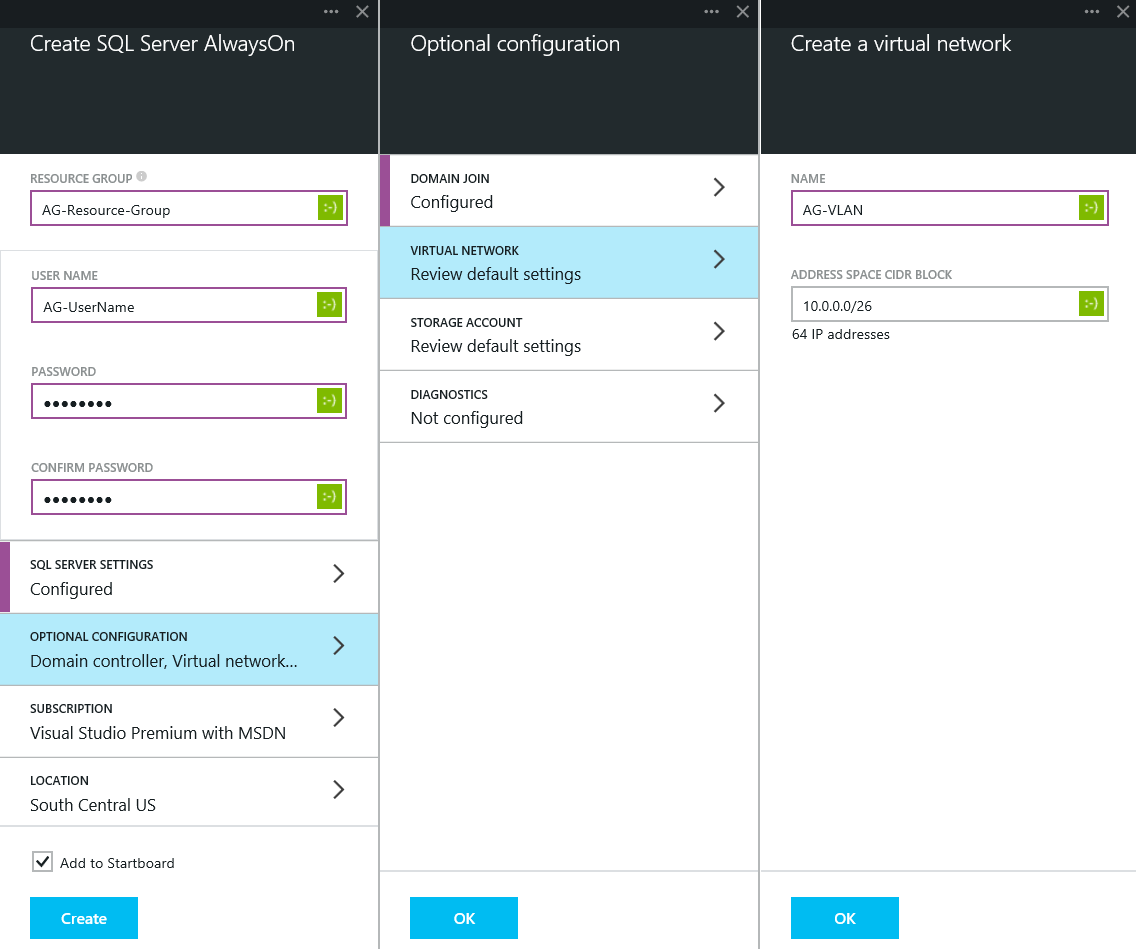
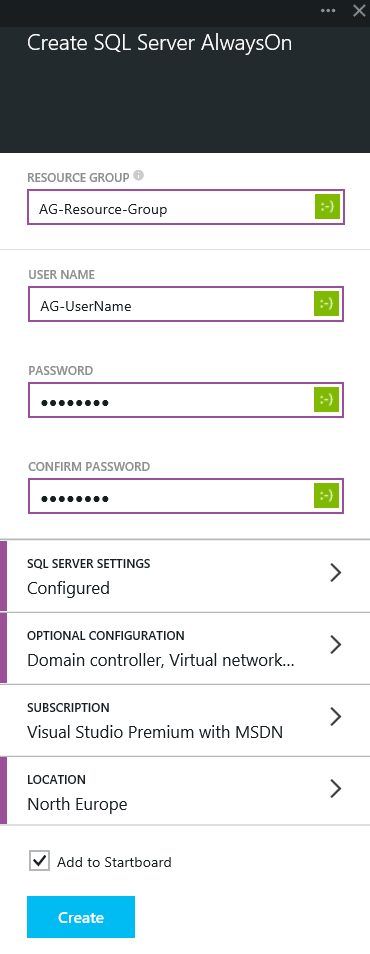
4) Once you have selected the SQL Server 2014 AlwaysOn option the screen below appears. Complete the fields with your chosen user names and passwords. The Resource Group is a name for a collection that makes it simple to see and manage related Azure resources.

5) Once complete select the SQL Server Settings – Configure Settings option. Specify a host name prefix, an availability group name, and a name for the availability group listener. Clicking PRICING TIER will allow you to select from 3 pre-defined pricing options for your SQL Servers, there is also an option to browse all pricing tiers. I selected the 4 core 28GB variant.
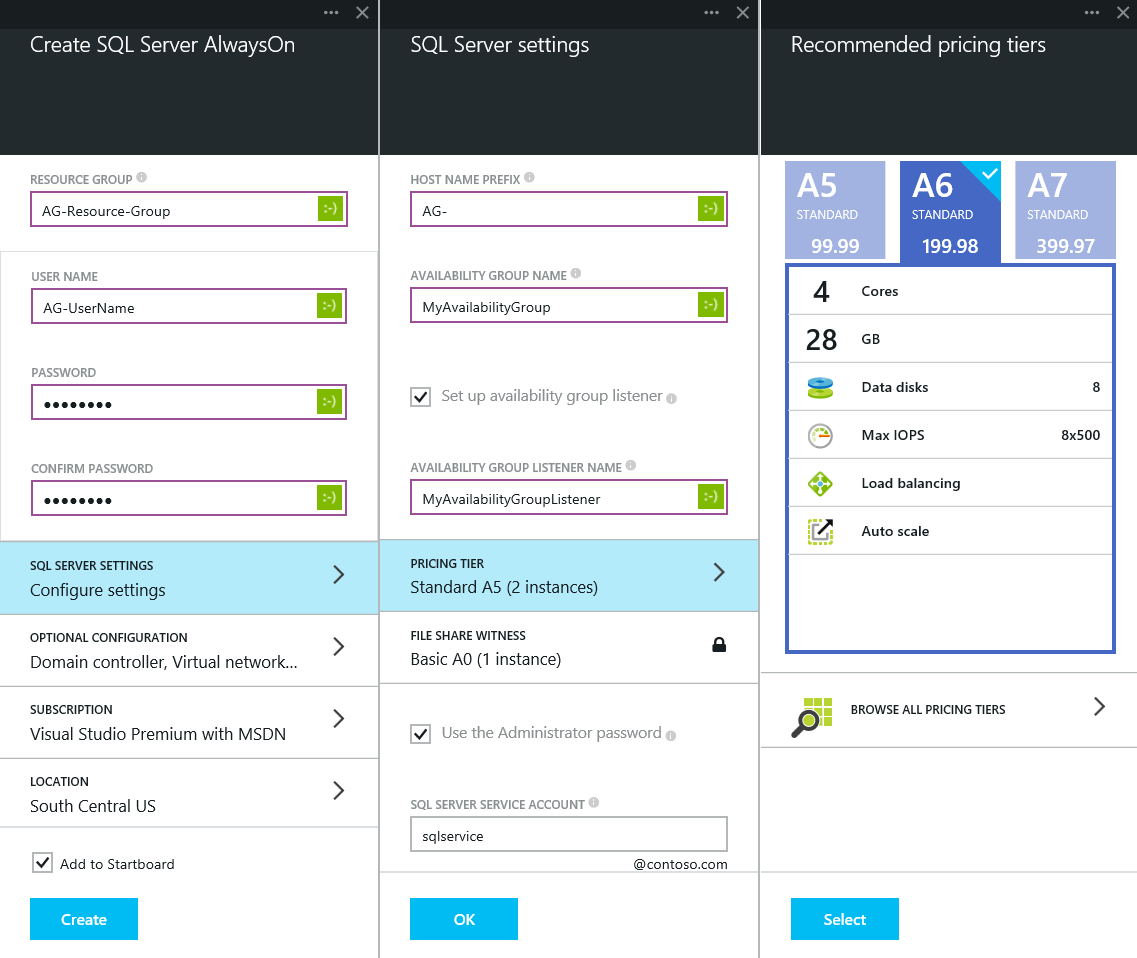
6) Ensure that you give the SQL Server Service account a descriptive name and appropriately strong password. Once finished click OK.
7) Moving into the domain configuration, the first thing is to specify a hostname prefix (I’ve used the same prefix as in step 5). Give your domain a name and select the pricing tier for your domain controllers.
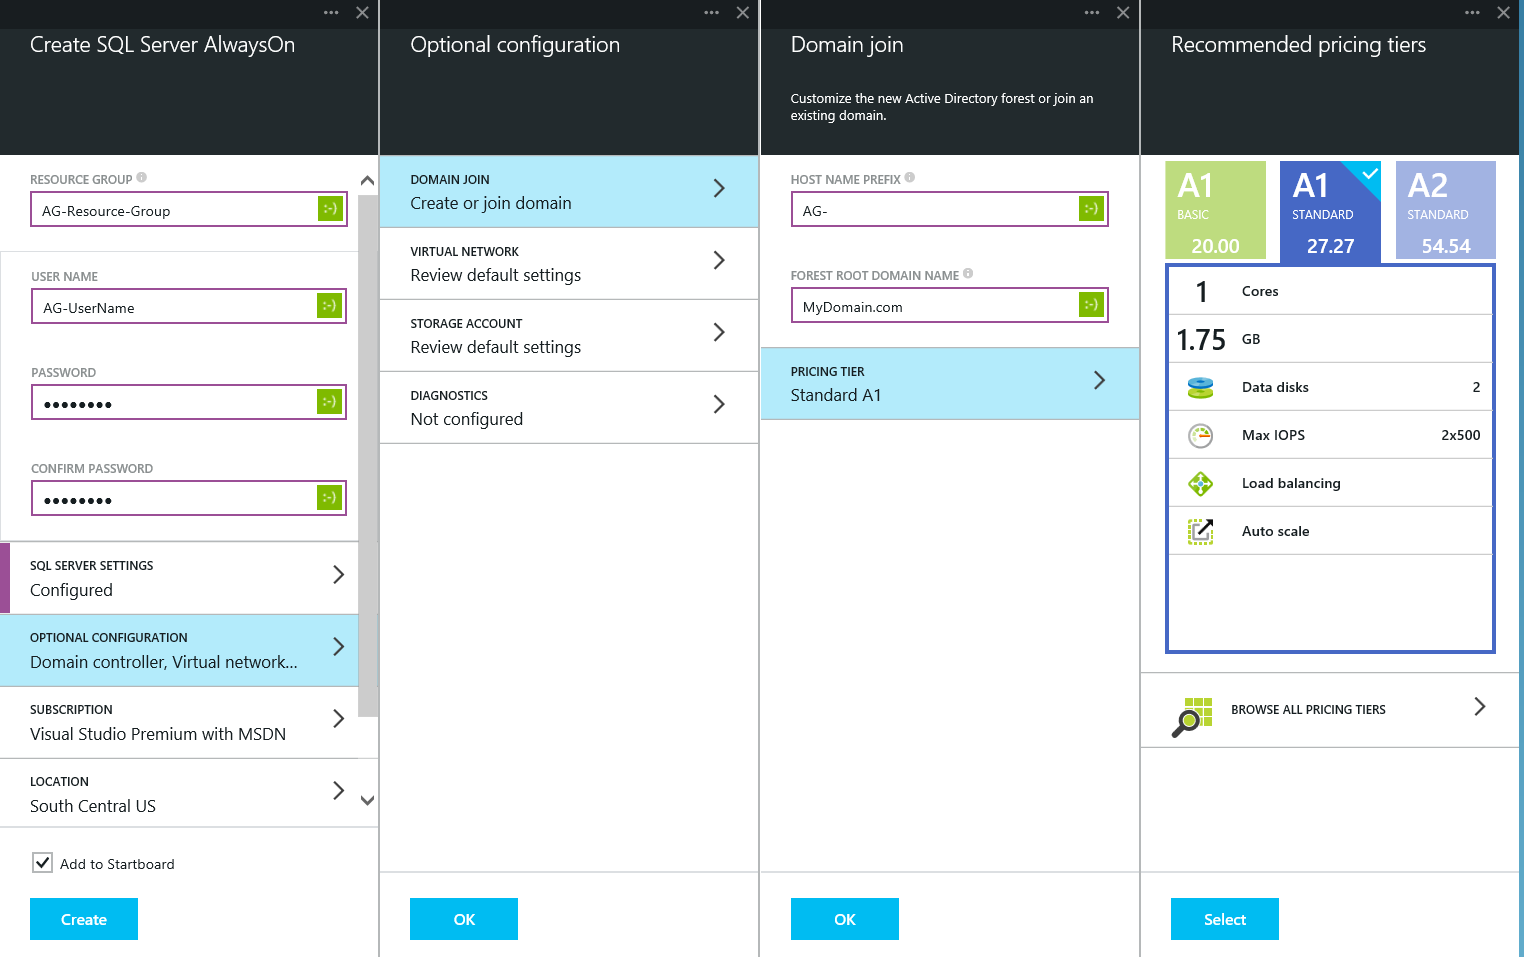
8) Configuring a virtual network is easy. Specify a name for your virtual network and an IP address range.
9) Storage accounts within Azure are containers for blob storage. All hard disks associated with Azure VMs are treated as blob storage and therefore you must specify a storage account to hold them. The account must have a unique name. If you have already created a storage account then you may use this to store your VMs. Select an appropriate pricing model.
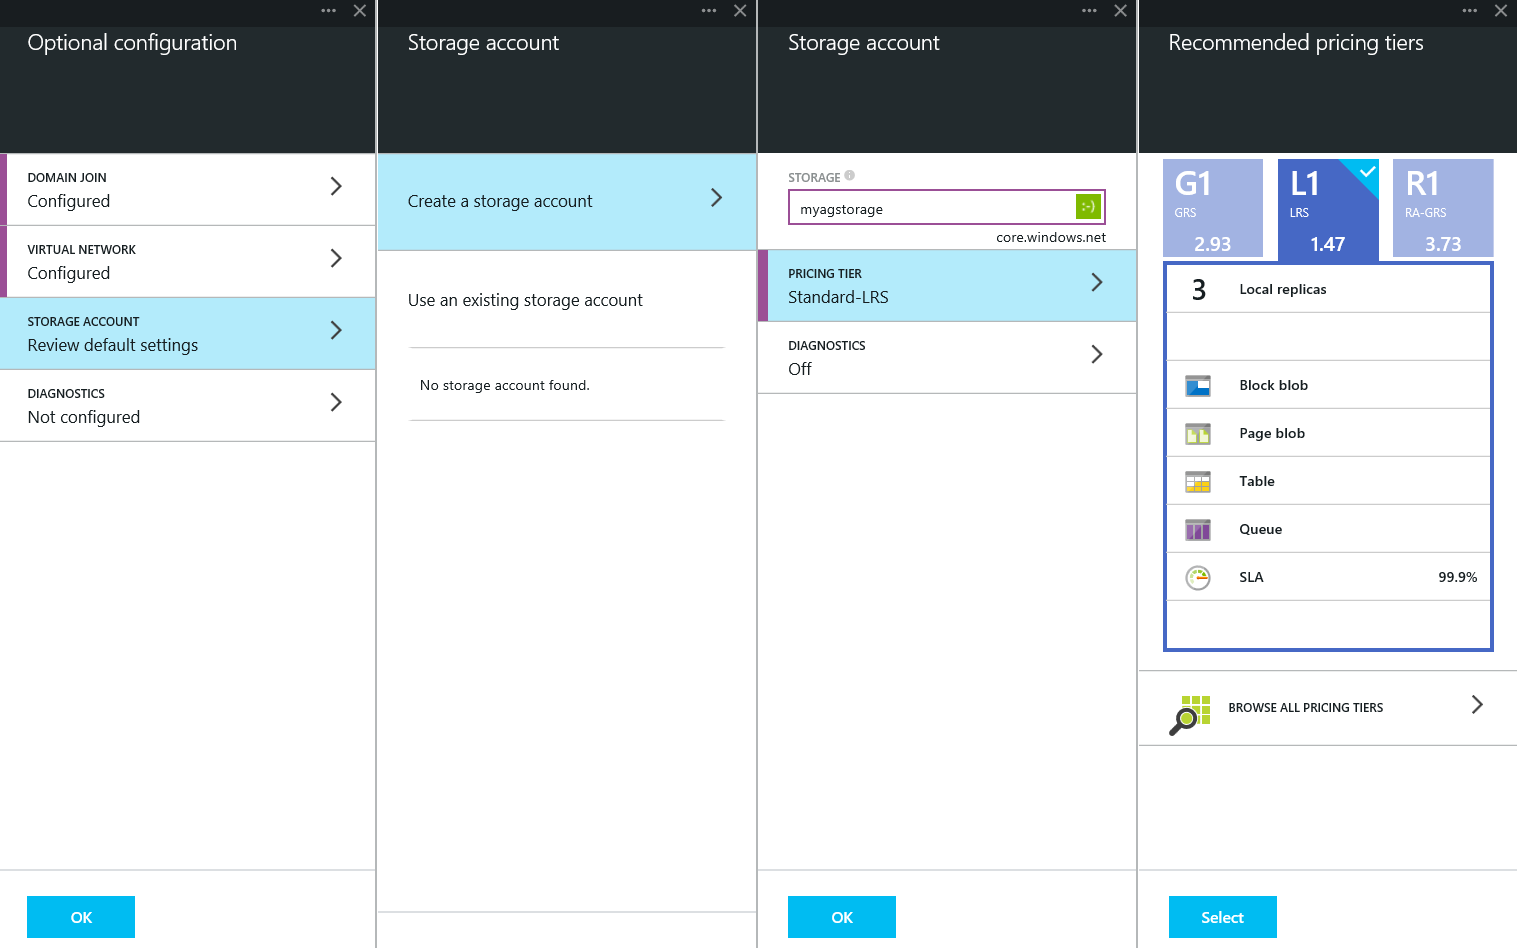
10) Once the storage is configured the only thing left to do is to choose the data centre where you want your VMs to be strored. I have chosen Northern Europe (Dublin). Click Create and you’re done!
The creation process takes about an hour to complete but can vary depending on the time of the day. Once the creation is complete you will be able to see all of the VMs that were created to form the solution by select Browse – Virtual Machines from the Auzure Portal landing page.
Now you can start adding databases to your availability group! I hope you’ve found this tutorial useful.
Azure is great for quickly creating a proof of concept, or sandbox environment that you can play about in. More importantly Azure has the capability to provide an enterprise scale platform once your POC has been proven. I would encourage you to create all your POC’s in Azure from today. Too many times I’ve worked for companies where great ideas have been shelved and forgotten because the procurement process for physical kit, or reliance on virtualisation teams was hampering the exploration ideas.
Cloud providers are dramatically changing the speed of delivery for IT. I for one am completely sold on “The Cloud” and the more I explore the Azure platform the more excited I am about my upcoming projects and how it can help!